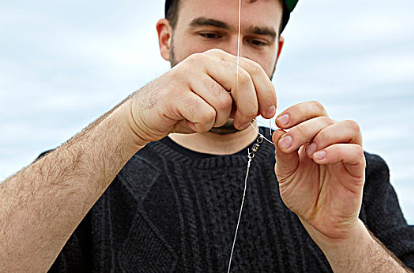
You want to tie a hook line well, first, you have to learn how to tie the knot. Below I will introduce you to the common knots and how to tie them.
Any experienced angler will tell you that saltwater fishing uses many different fishing knots. There is one important thing to consider when choosing the gear you need for your fishing trip: which fishing gear do you plan to use? Saltwater fishing sets are made up of several different components, such as hooks and guides, rod lines, swivels and drop lines, floats, and beads. But ultimately, your set-up will depend on the type of fish you are after, as this determines whether the set-up needs to sink or float. Thankfully, there are many reliable saltwater fishing knots that you can use for a wide variety of lines, leaders, and lures to match the vast array of rigging styles you’ll be repairing before you head out or even when you’re out on the water.
How Do I Choose the Right Knot to Tie a Hook
A wide variety of tried and true saltwater fishing knots are used for a variety of lines, tippets, and lures that will match the style of rig you are using.
When selecting the knot you should use, it comes down to the rig you will be using. Your rig should be sinking or floating depending on the species of fish you will be fishing.
A saltwater fishing platform consists of a combination of the following components:
Hooks and lead lines
The line to the rod
Swivel and drop lines
Floats and beads
Tools for Tying Saltwater Fishing Hooks
Before you start tying Hooks, there are a few tools that can help make the process faster and easier:
Fishing pliers for gripping and tying knots
Cutters for cutting the line (built into the pliers or individual scissors.)
Basic Fishing Knots for Tie a Hook
Clinch Knot
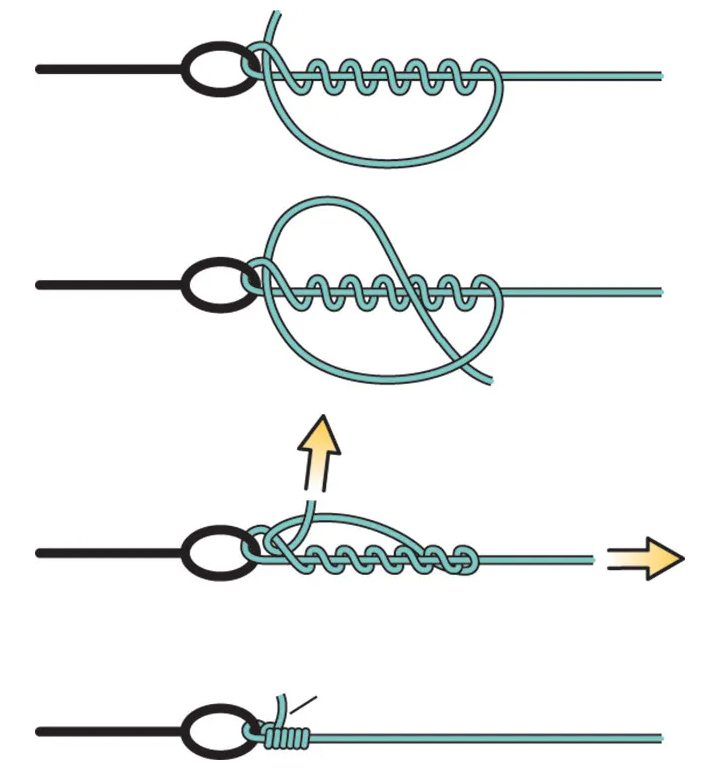
The Clinch knot is a widely used fishing knot for attaching a fishing line to a hook, lure, or swivel. It is a relatively simple knot that provides a strong and reliable connection. The following is a step-by-step guide on how to tie a Clinch knot:
Step 1: Start by passing the end of the fishing line through the eye of the hook or lure. Make sure you have enough lines to work with, but leave some extra lines to tie the knot.
Step 2: Take the tag end and wrap it around the standing line 5-7 times. The standing line is part of the fishing line and can be returned to your fishing rod.
Step 3: Once you have finished wrapping, pass the tag end of the line through the small loop formed above the eye of the hook or lure.
Step 4: Hold the tag end and the standing line while pulling on the tightening knot. Make sure to keep the wrap neat and comfortable as you tighten it.
Step 5: Once the knot is tightened, trim the excess tag end with scissors or a knife, leaving a small tag for safety purposes.
Palomar Knot
The Clinch knot is a widely used fishing knot for attaching a fishing line to a hook. It is a relatively simple knot that provides a strong and reliable connection. The following is a step-by-step guide on how to tie a Clinch knot:
Step 1: Begin by doubling your fishing line to create a loop. Take the end of the line and pass it through the eye of your hook, lure, or swivel. Make sure you have enough line to work with but leave some excess for tying the knot.
Step 2: Tie a loose overhand knot with the doubled section of the line. To do this, simply cross the doubled line over itself to form a loop and then pass the end of the line through the loop.
Step 3: With the overhand knot loosely formed, take the loop you created and pass it completely over the end of the hook, lure, or swivel. The entire hook should now be enclosed within the loop.
Step 4: Grasp both the loop and the standing line (the part of the line that goes back to your fishing rod) and pull on them simultaneously. This will begin to tighten the knot. Make sure to apply steady and even pressure to all parts of the knot.
Step 5: Continue pulling until the knot is snugly tightened. You can moisten the knot with water or saliva to help reduce friction and aid in tightening. Once tightened, the Palomar knot should be secure and strong.
Step 6: After ensuring the knot is tight, trim any excess tag end of the line using scissors or a knife. Leave a small tag for safety purposes, but remove any excess that may interfere with your fishing activities.
Turtle Knot

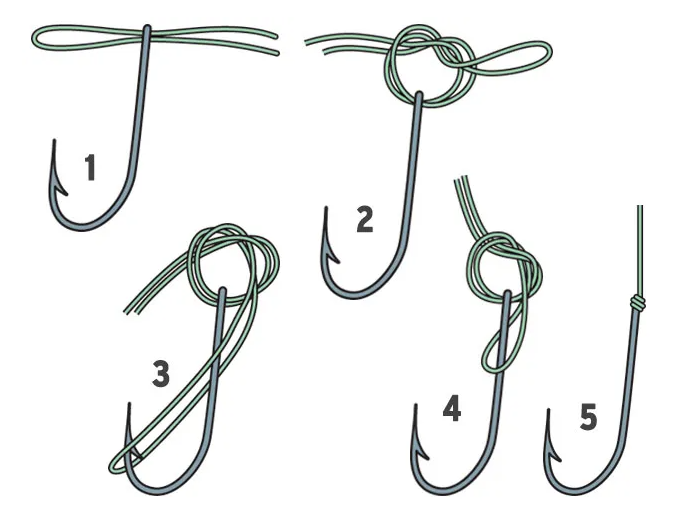
The Turtle Knot is a reliable and straightforward knot used in fishing to secure a hook or lure to the fishing line. It is known for its strength and resistance to slipping. Here is a step-by-step guide on how to tie the Turtle Knot:
Step 1: Begin by running the fishing line through the eye of the hook. Ensure that you have an adequate amount of line to work with, usually around 8-10 inches.
Step 2: Take the tag end of the line and pass it back through the eye of the hook, creating a small loop.
Step 3: Hold the loop and tag the end of the line between your thumb and index finger, creating an open loop.
Step 4: Take the tag end and wrap it around the standing line twice, forming two loops around the standing line.
Step 5: Pass the tag end through the small loop you created in Step 2. This will create a larger loop around the standing line.
Step 6: Hold onto the larger loop with your thumb and index finger, ensuring that the loops do not overlap or twist.
Step 7: Slowly and carefully tighten the knot by pulling both the standing line and the tag end simultaneously. Make sure to maintain tension throughout the process to prevent the knot from slipping.
Step 8: Once the knot is almost tightened, wet it with water or saliva to lubricate it. This will help reduce friction and ensure a secure knot.
Step 9: After wetting the knot, continue pulling the standing line and the tag end until the knot is fully tightened against the eye of the hook.
Step 10: Trim the excess tag end of the line, leaving a small tag of about 1/4 inch for safety and to avoid accidentally undoing the knot.
Conclusion About How to Tie a Hook for Saltwater Fishing
In conclusion, tying a hook for saltwater fishing requires a strong and reliable knot that can withstand the challenges posed by the environment and the powerful fish you may encounter. By following the step-by-step guide provided, you can tie the knot with ease.
Remember to always leave a tag end of about 1/4 inch when trimming the excess line after tying the knot. This ensures the safety and prevents accidental knot unraveling. Additionally, regularly check your knots for any signs of wear or damage, as the corrosive nature of saltwater can weaken the knot over time.
By mastering the art of tying the hook for saltwater fishing, you can enhance your angling experience and increase your chances of successfully landing that prized saltwater catch. Practice tying the knots beforehand to ensure proficiency and confidence when out on the water.
FAQs About How to Tie a Hook for Saltwater Fishing
Q1: Are there other knots besides the Improved Clinch Knot that are suitable for saltwater fishing?
A1: Yes, there are several other knots that are commonly used for saltwater fishing, such as the Palomar knot, Uni knot, and Snell knot. Each knot has its own strengths and applications, so it’s worth exploring and practicing different knots to determine which one works best for your specific fishing needs.
Q2: How do I know if the knot is secure enough for saltwater fishing?
A2: After tying the knot, it’s essential to test its strength by applying gentle but firm pressure. If the knot slips or shows any signs of weakness, it’s advisable to retie it. Additionally, regularly inspect the knot during fishing to ensure it remains secure and intact.
Q3: Should I use a specific type of fishing line for saltwater fishing?
A3:Yes, saltwater fishing typically requires a more durable and corrosion-resistant fishing line. Monofilament, fluorocarbon, and braided lines are commonly used for saltwater fishing. Choose a line that suits your fishing style, target species, and the conditions you’ll be fishing in.
Q4:How can I prevent my knot from weakening due to saltwater corrosion?
A4: Saltwater can be corrosive to fishing knots and lines over time. To minimize the impact of corrosion, rinse your fishing gear with fresh water after each saltwater fishing session. It’s also helpful to store your gear properly, away from excessive moisture and salt exposure.
Q5: Are there any specific techniques for tying hooks in heavy surf or strong currents?
A5: When fishing in heavy surf or strong currents, it’s crucial to ensure your knot is extra secure. Consider making additional wraps when tying the knot to increase its strength. You can also apply some knot lubricant or saliva to help with tightening and reducing friction. Lastly, check the knot regularly during your fishing session to ensure it remains strong and intact.